

Minimum Required Version
: Expert 4.14.0.R, Guardian 4.14.0.R
This example will demonstrate how the Guardian DRC tool can be used to measure the width of layout object.
1. Preliminary steps
To run this example, open a Guardian DRC session and choose
File->Open
to load the project
“drc_ex07.eld”
downloaded. Then open the top cell
drc_ex07
using the
Cell->Open…
menu.
2. WIDTH measurement for error detection
The width of a layout object is one of the most common checks in a Design Rule Check foundry file. Metal, poly,
contact and via widths are all geometries that need to be checked and reported as errors they when do not meet
the minimum requirements.
Guardian DRC
can be used to implement these width checks.
The syntax used to implement this check is as follow:
     WIDTH: Layer= < input layer identifier >, Value=< value >,
            Type= < check type >,  LayerR= < result layer identifier >,
            Options= (list of check options), ID= < error identifier >;
in which:
-
Layer
is the layer name being measured -
Value
is the value in um of the measurement -
Type
can be greater than, less than, (>, <, ==, !=, …) -
LayerR
is the layer name in which the geometries in violation of the rule would be saved -
Options
is the list of additional options to the check. For example, the option
P
requires that the width of a layout object is being measured only between parallel segments -
ID
is the error message that would be displayed and listed in the log when the error occur (ex: M1 width error)
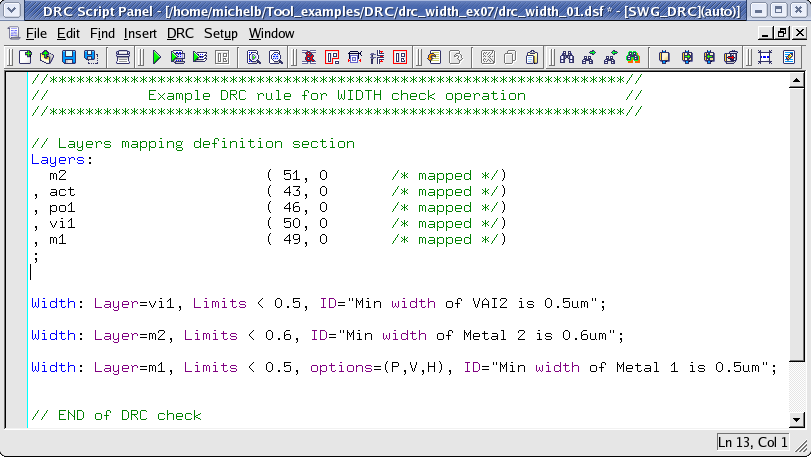
Figure 1
illustrates the syntax that can be used to implement such a task.
As it can be seen in
Figure 1
, the options
P, V
and
H
were used for the last check. These are for parallel, Vertical and horizontal respectively.
More options can be used. A detailed description of all options can be found in the
Guardian DRC user manual
section
2.3.9.1: Common Syntax: Parameters and Options.
Section 2.3.9.2 describes the WIDTH commands. The user manual
“guardian_users1.pdf”
can be found in
lib/expert/4.14.0.R/docs/
in your installation area.
Some options are not allowed for certain DRC checks. For the WIDTH operation, I, T, N, N’ (
Intersecting, Overlapping, Notch,
and
Notch Only)
are NOT allowed.
Figure 1
also illustrates the use of layer mapping. This way, the layer name in the Guardian DRC rule deck does not have to
match the layer name in the layout. This allows the rule deck to be run on a GDS file in which layer name are not provided.
3. Experimenting with the WIDTH command
Once all the example files have been downloaded and the preliminary steps described in 1.0 are completed,
complete the following steps:
- Choose
Verification->DRC->DRC Script panel
. In this new window, choose
File->Open…
and select
“drc_width_01.dsf”.
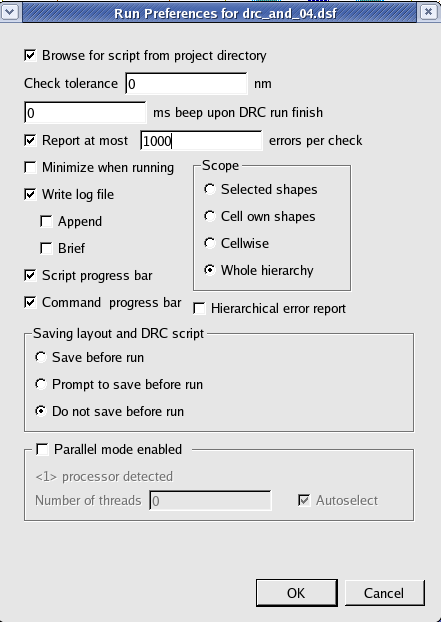
- In the same window, choose
Setup->Current DRC script run preferences…
and set the options as shown in
Figure2. - Accept the changes and press
DRC->Run
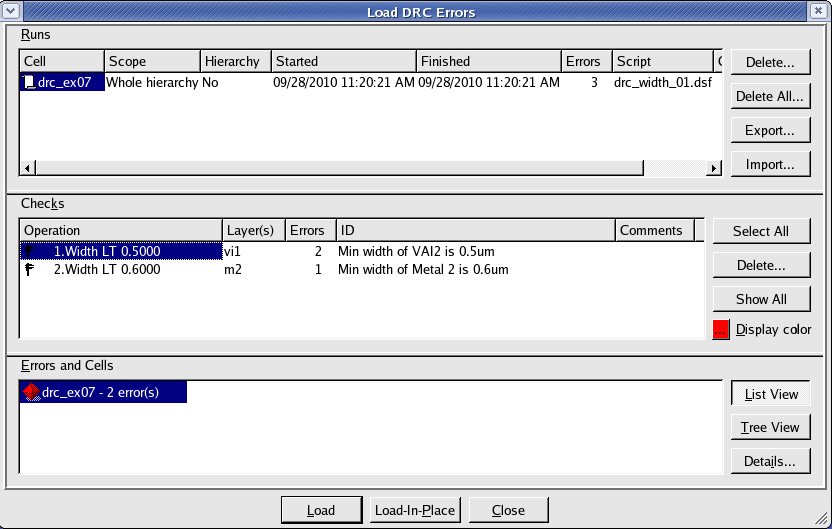
- To inspect the errors, choose
Verification->DRC->Errors->Load errors…
you should get a window as shown in
Figure 3. - Select the last check and press the
Load
button located at the bottom of the window. Then choose
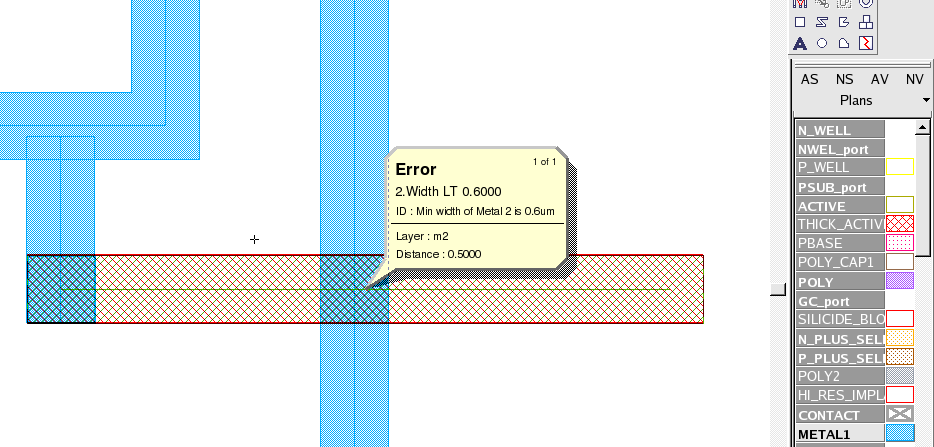
Verification->DRC->Errors->First error
to display the error in the layout, as shown in
Figure 4
. - To unload the error choose
Verification->DRC->Errors->Unload errors
.
Note that these two
toolbars
can be used to access the DRC menu command. To turn the visibility of the toolbar ON and OFF, choose
View->Toolbars
and select
DRC
and
DRC error inspection.
To understand the effect of the options, the user can reopen the script and remove the words
“options=(P,V,H)”
or load the second script provided
“drc_width_02.dsf”
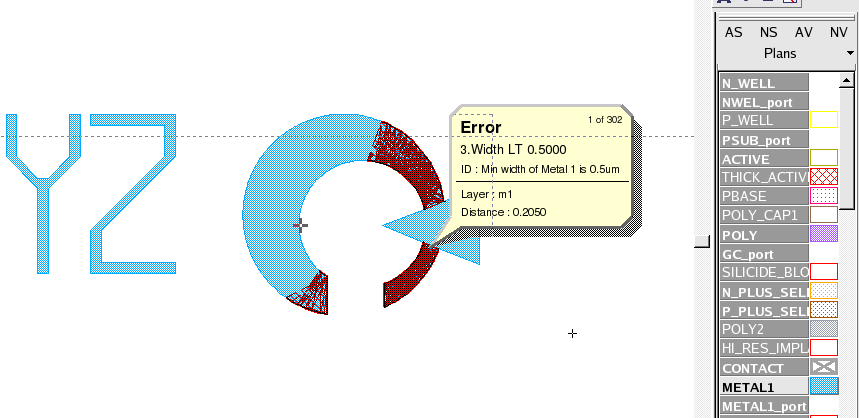
, and run the script again. You should see many DRC errors caused by the LOGO located in the upper portion
of the layout cell, as shown in
Figure 6.
Guardian DRC
can also be launched from within the Expert layout editor
Expert
. Within an Expert
session follow the steps described in 1.0 to open the eld file. Then choose
Verification->DRC->DRC Script panel.
In this new window, choose
File->Open…
and select desired DRC script. The rest of the steps are identical to the Guardian DRC flow.
Output Results

Input Files
drc_width_01.dsf
//****************************************************************//
//           Example DRC rule for WIDTH check operation           //
//****************************************************************//

// Layers mapping definition section
Layers:
  m2                      ( 51, 0	/* mapped */)
, act                     ( 43, 0 	/* mapped */)
, po1                     ( 46, 0 	/* mapped */)
, vi1                     ( 50, 0 	/* mapped */)
, m1                      ( 49, 0 	/* mapped */)
;


Width: Layer=vi1, Limits < 0.5, ID="Min width of VAI2 is 0.5um";

Width: Layer=m2, Limits < 0.6, ID="Min width of Metal 2 is 0.6um";

Width: Layer=m1, Limits < 0.5, options=(P,V,H), ID="Min width of Metal 1 is 0.5um";


// END of DRC check
drc_width_02.dsf
//****************************************************************//
//           Example DRC rule for WIDTH check operation           //
//****************************************************************//

// Layers mapping definition section
Layers:
  m2                      ( 51, 0	/* mapped */)
, act                     ( 43, 0 	/* mapped */)
, po1                     ( 46, 0 	/* mapped */)
, vi1                     ( 50, 0 	/* mapped */)
, m1                      ( 49, 0 	/* mapped */)
;


Width: Layer=vi1, Limits < 0.5, ID="Min width of VAI2 is 0.5um";

Width: Layer=m2, Limits < 0.6, ID="Min width of Metal 2 is 0.6um";

Width: Layer=m1, Limits < 0.5, //options=(P,V,H),
 ID="Min width of Metal 1 is 0.5um";


// END of DRC check